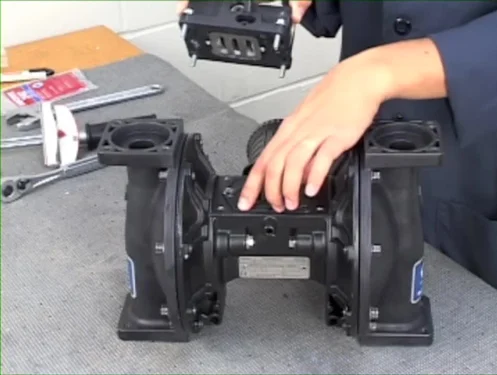


Disassemble and assemble a bomba diaphragm requires specific tools and careful step by step. Regular maintenance, including inspections and cleaning, is crucial to ensure optimal performance and extend the life of the pump.
Disassembling and assembling a diaphragm pump may seem like a complex task, but with the right guide, you will do it like an expert! In this article, we will detail everything you need to know about diaphragm pump, including the necessary tools and a practical step-by-step guide to ensure you carry out this task successfully and safely.
What is a diaphragm pump?
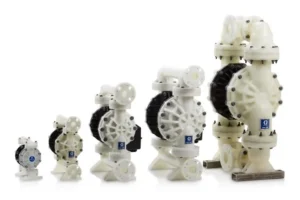
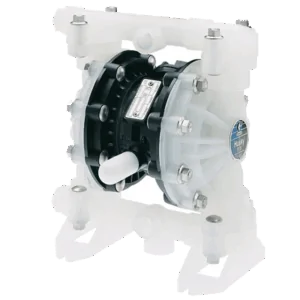
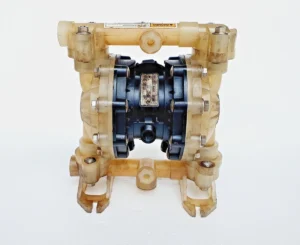
One diaphragm pump is a pumping device that uses a flexible diaphragm to move fluids. This type of pump is widely used in various industries due to its ability to handle viscous, corrosive liquids and even suspended solids.
The basic operation of a diaphragm pump involves the movement of the diaphragm, which creates a pressure variation within the pump chamber. When the diaphragm moves down, it creates a vacuum that pulls fluid into the chamber. When the diaphragm moves up, it pushes fluid out of the pump. This continuous cycle allows for a constant flow of liquid.
Advantages of Diaphragm Pumps
Diaphragm pumps are known for their efficiency and reliability. They are capable of operating in adverse conditions and can be adjusted to different pressures and flow rates. Furthermore, as there is no direct contact between the fluid and moving parts, the risk of contamination is minimized, making them ideal for applications in the food and pharmaceutical industries.
Common applications
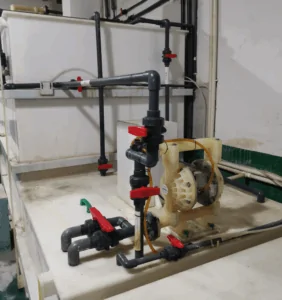
These pumps are often used in painting processes, chemical transfer, irrigation systems and even laboratory equipment. Their versatility makes them a popular choice in many industrial applications.
Tools required for disassembly and assembly
To disassemble and assemble a diaphragm pump efficiently, it is essential to have the appropriate tools. Listed below are the main tools needed to carry out this task safely and effectively.
1. Screwdrivers
Screwdrivers are essential for removing screws that hold the pump parts together. It is important to have different sized wrenches to suit the different types of screws that can be found.
2. Chaves Allen
Allen wrenches are often used on diaphragm pumps, especially for screws that have hexagonal heads. Having a complete set of Allen wrenches will make the disassembly process easier.
3. Pliers
Pliers are useful for holding small parts or helping to remove components that are tight. Pressing pliers can be especially useful in some situations.
4. Protective Gloves
Wearing protective gloves is essential to ensure safety when handling parts and tools. They protect your hands from cuts and chemical substances that may be present.
5. User Manual
Having your diaphragm pump user manual on hand is an excellent practice. It provides pump model-specific information, including disassembly and assembly instructions, as well as maintenance details.
Step by step: dismantling the diaphragm pump
Dismantle one diaphragm pump may seem challenging, but following a step by step simple, you can perform this task safely and efficiently. Here are the steps you should follow:
1. Environment Preparation
Before you begin, make sure your work environment is clean and organized. Gather all necessary tools, such as screwdrivers, Allen wrenches, and protective gloves. Disconnect the pump from the power source and close the fluid inlet and outlet valves.
2. Cover Removal
Use the screwdriver to remove the screws that secure the pump cover. Place screws in a safe place to avoid loss. Carefully lift the cover to expose the inside of the pump.
3. Diaphragm Disconnection
With the cover removed, locate the diaphragm. Disconnect it from the brackets or screws that hold it. It is important to handle the diaphragm carefully to avoid damage.
4. Removing Internal Parts
After disconnecting the diaphragm, remove internal parts such as valves and seats. Use the appropriate tools to loosen any screws or connections holding these parts in place.
5. Cleaning and Inspection
With all parts removed, carefully clean each component with a clean cloth and suitable solvent. Inspect parts for wear or damage, which may require replacement before reassembly.
Step by step: assembling the diaphragm pump
Assemble a diaphragm pump correctly is essential to ensure its efficient operation. Below are the detailed steps to carry out this assembly safely and effectively.
1. Preparation of Parts
Before starting assembly, check that all parts are clean and in good condition. This includes the diaphragm, valves, seats and cover. Make sure there is no dirt or debris that could affect the pump's performance.
2. Diaphragm Installation
Start by positioning the diaphragm in the pump chamber. Make sure it is properly aligned with the brackets. Use the appropriate screws to secure it, ensuring that it is securely fastened, but without over-tightening to avoid damage.
3. Assembling the Valves
After installing the diaphragm, place the valves and seats in the correct positions. Valves must be installed according to the guidance indicated in the user manual. Use the screws to fix them, ensuring they are firm.
4. Placing the Lid
With all internal parts assembled, place the cover back on the pump. Align the screw holes and carefully attach the cover. Make sure all screws are tightened evenly to prevent leaks.
5. Function Test
After assembly, it is important to carry out a functional test. Connect the pump to the power source and open the inlet and outlet valves. Check for leaks and that the pump is operating correctly. If everything is in order, the pump is ready for use.
Tips for maintaining diaphragm pumps
Proper maintenance of diaphragm pumps It is crucial to guarantee its performance and extend its useful life. Here are some essential tips for maintaining these pumps.
1. Regular Inspection
Perform regular inspections of pumps to check for signs of wear or damage. Pay special attention to the diaphragm, valves and connections. Any sign of a leak must be addressed immediately.
2. Frequent Cleaning
Keep the pump clean by removing debris and dirt that may accumulate. Use a clean cloth and suitable solvent to clean the external and internal parts as necessary.
3. Lubrication of Moving Parts
If the pump has moving parts, it is important to lubricate them according to the manufacturer's recommendations. This helps reduce friction and wear, ensuring smooth operation.
4. Connection Check
Regularly check all connections and hoses to ensure they are tight and leak-free. Loose connections can cause pump failure and unwanted leaks.
5. Replacing Worn Parts
If you identify worn or damaged parts during inspection, replace them immediately. This includes diaphragms, valves, and other critical components that can affect pump performance.
Maintenance and Assembly of Diaphragm Pumps
Maintaining and correctly assembling a diaphragm pump is essential to ensure its efficient operation and extend its useful life. By following the disassembly and assembly steps, as well as maintenance tips, you can avoid problems and ensure that the pump operates optimally.
Regular inspections, frequent cleaning and replacement of worn parts are practices that help keep the pump in excellent condition. With the right knowledge, you can perform these tasks with confidence and security.
Therefore, do not underestimate the importance of correct maintenance and assembly of diaphragm pumps for the success of your operations.
FAQ – Frequently asked questions about maintenance and assembly of diaphragm pumps
What are the main precautions when maintaining diaphragm pumps?
Main care includes regular inspections, frequent cleaning, lubrication of moving parts and replacement of worn components.
How do I know if my diaphragm pump needs maintenance?
Signs that the pump needs maintenance include leaks, strange noises, and lower-than-expected performance.
What tools are needed to disassemble a diaphragm pump?
Required tools include screwdrivers, Allen wrenches, pliers and protective gloves.
Is it difficult to assemble a diaphragm pump after disassembly?
No, as long as you follow the instructions correctly and have the appropriate tools, assembly can be done simply.
How often should I perform diaphragm pump maintenance?
Maintenance must be carried out regularly, depending on the use of the pump, but at least once a semester is recommended.
Can I maintain the diaphragm pump myself?
Yes, as long as you have the necessary knowledge and tools, maintenance can be carried out by yourself.